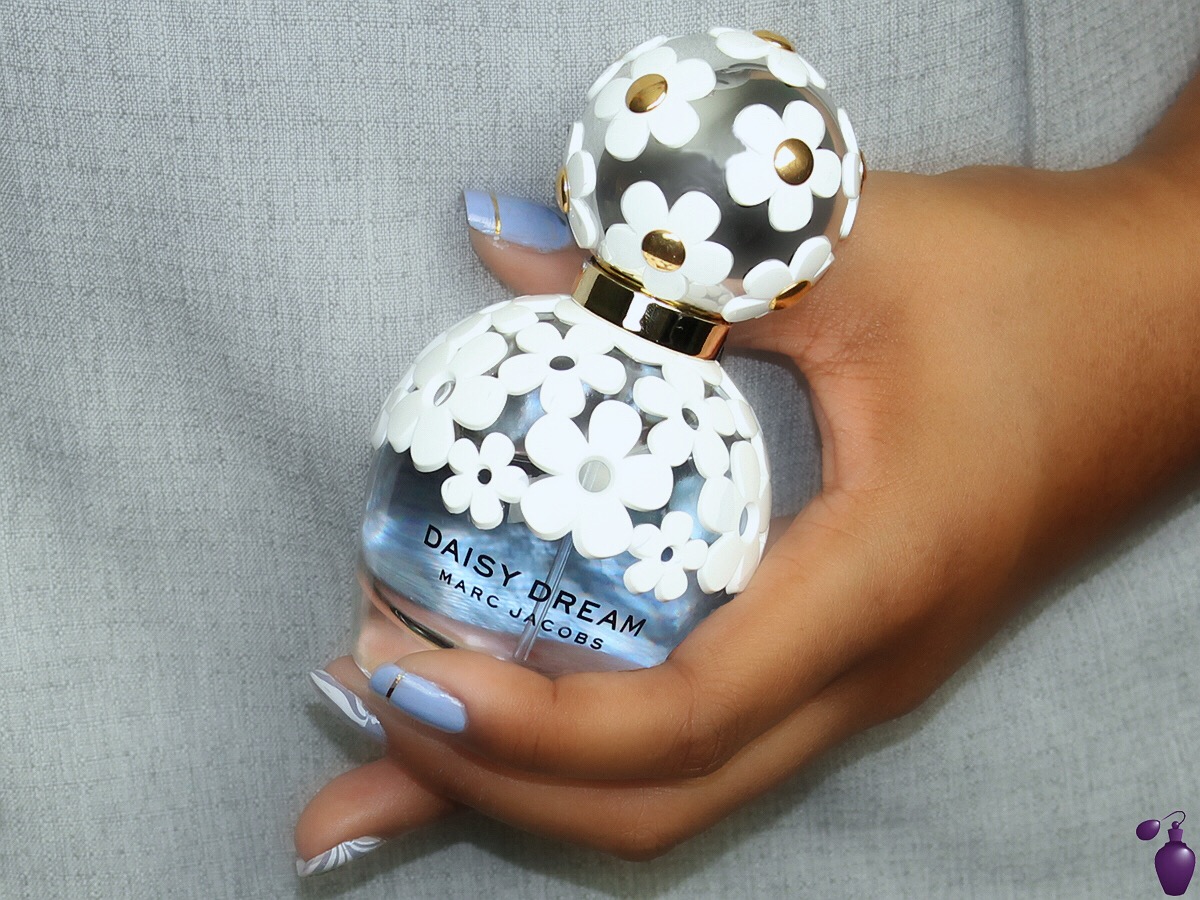
How to Get Marc Jacobs Daisy Dream Inspired Nails
How to get Marc Jacobs Daisy Dream Inspired Nails:
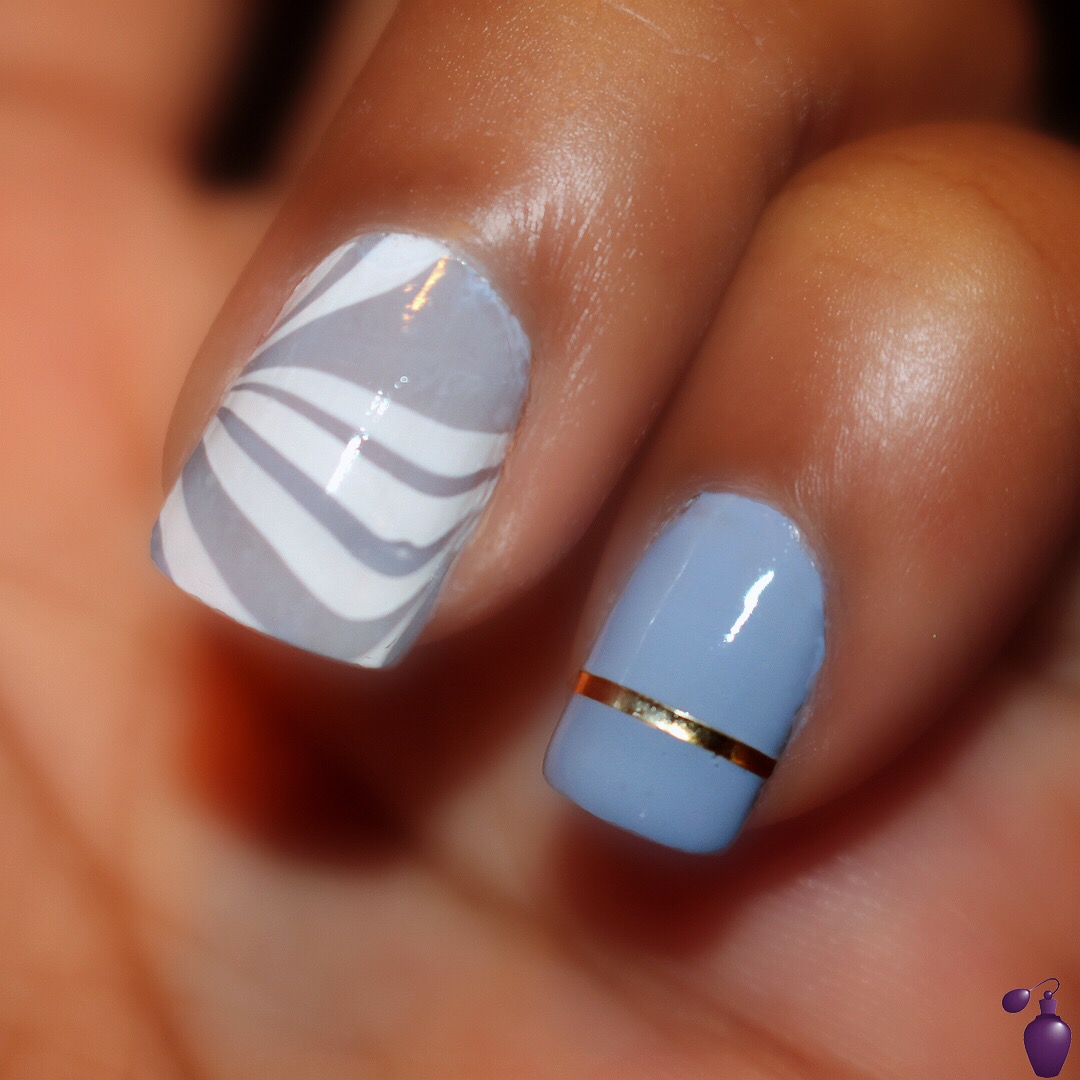
Step 1: Pick out your favorite nail polish. Make sure that you choose colors that are complimentary to your favorite fragrance. For this tutorial, since we're focusing on Daisy Dream, we chose a white, light blue, and gold nail lacquer from one of our favorite brands...Butter London!
Step 2: Get inspiration for your nail design and grab your tools! I was inspired by the Daisy Dream bottle because it is decorated with white daisies motives and a highlight of gold sparkle. I didn't want to take the bottle design too literal so instead, I decided to use my nail lacquer colors and create a daisy dream inspired water marble nail design.
To achieve this look, you will need:
- Nail Polish Remover
- A toothpick (or a nail art tool kit)
- One cup/bowl filled with warm water
- Paper Towels
- Q-Tips
- Nail Lacquer
- A fun imagination
Step 3: Take your nail polish remover and pour a drop or two of it into your cup with warm water. You should do this in order to thin out the nail polish so that it spreads out into the water easier - which will make it easier to create your design.
Step 4: Choose a polish color that you want to start with and take out the wand. Hold it over the cup, and let the drop fall in the water. It might take a few minutes for the first drop to fall so be patient! Don't try to wipe or dip the wand into the water.
Step 5: Once the polish drop falls into the water, watch how quickly it moves across the water's surface. As you're watching this, you should grab your next polish color, take out the wand, and add a drop of polish into the center of the first polish.
Step 6: Keep alternating colors until you achieve your desired level of color distribution. Be careful though - you're going to want to decide quickly because the longer you take, the quicker you're polish is hardening in the water.
Step 7: Take a toothpick and start creating the design that you want - draw lines, swirl the colors - whatever you want.
Step 8: When done, dip your nail into the cup and count to ten seconds for the outer nail polish to dry. To avoid a messy clean up, take the toothpick and in a spinning motion, pick up the nail polish that is left over in the cup.
Step 9: Take your finger out of the cup and take a look. The design should be printed on the nail.
Step 10: Repeat these steps to all of the other nails that you want to be designed the same way. Don't worry if it's messy at first. That's why you have the nail polish remover and the q-tips!
Step 11: Once you've created your design on all of the nails that you want, add a quick drying top coat to it and then begin to clean up.
Now your nails match your favorite fragrance!